
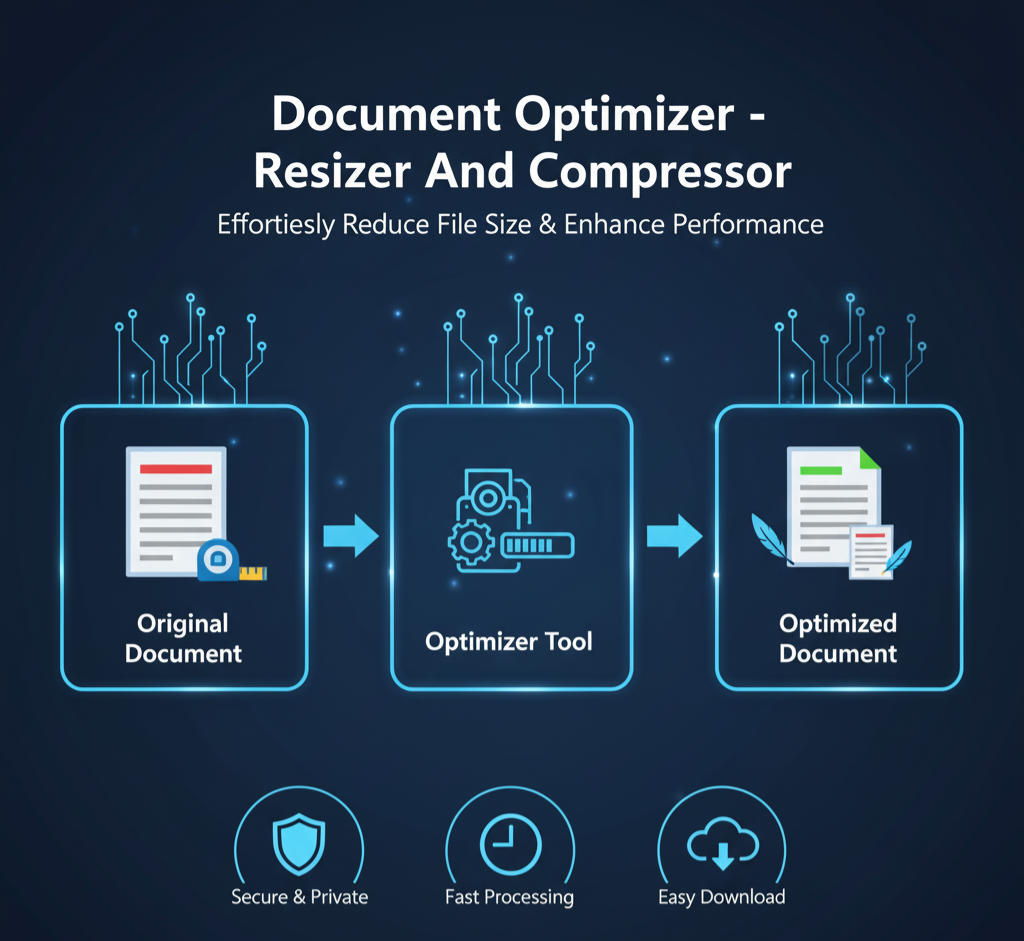
⚙️ Document Optimizer
Quickly adjust size and quality for E-Forms & Portals.
Please upload your document image.
Step 2: Set Output Standards
The tool will auto-adjust quality to meet this KB limit.
Starting Quality: 95%
Processing image and optimizing size… Please wait.
✨ Optimization Complete!
Your document is ready for download. Check the new file size below.
The Ultimate Guide to Resizing Documents Under KB Limit for Government Portals: Guaranteed Compliance for eMitra Operators
1. The Critical Problem: Form Rejection and the Kiosk Operator’s Nightmare
If you operate an eMitra Kiosk, a CSC (Common Service Centre), or manage documentation for a small business, you know the frustration: a critical application—for a PAN Card, Aadhaar update, Passport, or any State Government scheme—is instantly rejected. The reason is almost always the same: “Document file size exceeds the permissible limit of X KB” or “Image dimensions are incorrect.”
This relentless cycle of rejection is not just an inconvenience; it’s a massive drain on your time, your client’s patience, and ultimately, your business reputation. You are forced into a futile trial-and-error loop: resizing the image in basic photo editors, checking the size, finding it’s still too large, lowering the quality blindly, and often ending up with a blurry, unusable mess.
The core challenge is that government and official portals impose a dual compliance standard. You must meet two requirements simultaneously:
- Pixel Dimensions (Width x Height): The exact geometric size required (e.g., 350×450 pixels).
- File Size (Kilobytes – KB): The strict bandwidth limit (e.g., must be between 20 KB and 50 KB).
This guide is your definitive solution. We will break down why these strict limits are essential, expose the flaw in traditional resizing methods, and introduce a powerful new technology—the Document Optimizer—that uses an intelligent, iterative algorithm to guarantee your file meets the required KB limit every single time.
2. Why Strict KB and Pixel Limits Are Non-Negotiable
Government and large institutional portals, such as those for UPSC, SSC, various state application forms, and even tax filing, handle data at an enormous scale. Their restrictions are rooted in three major technical necessities:
A. Storage Efficiency and Cost Management
Imagine a server storing millions of application forms, each requiring multiple documents (photo, signature, ID proof). If every file was 5 MB instead of 50 KB, the overall storage space required would be 100 times larger. Strict KB limits are fundamental for massive-scale database management, cost control, and preventing servers from crashing due to sudden influxes of large data packets.
B. Bandwidth and System Speed
Smaller files load much faster, which is critical for two groups:
- Applicants (You/Your Client): A fast-loading form reduces drop-off rates and improves the user experience, especially in areas with limited or slow internet connectivity.
- Verification Officers: When a government officer opens a batch of files for verification, they need near-instant access. Large files slow down the entire system, leading to bottlenecks and massive operational delays. KB limits directly translate to faster processing times.
C. Standardization for Automated Verification
Pixel dimensions are mandatory for automated processing. Automated systems use algorithms for tasks like facial recognition, signature matching, and document indexing. For example, a system designed to look for a face within a specific 300×300 pixel boundary cannot function reliably if the image is uploaded in an unconventional size like 1200×800. The dimensions standardize the data input, ensuring the backend technology works as intended.
3. The Failure of Traditional Resizing Methods
Before the Document Optimizer, operators relied on methods that inherently cannot solve the dual-compliance problem:
Method 1: Basic Photo Editors (e.g., MS Paint)
- What they do: These tools excel at changing pixel dimensions (width and height). You can easily set your image to 300×300.
- The Flaw: When you save the resized image, the KB size is completely unpredictable. Depending on the complexity of the original image, the new file might still be 400 KB, instantly triggering a rejection, despite having the correct dimensions. You are forced to guess.
Method 2: Generic Online Compressors
- What they do: These tools let you move a “Quality” slider from 100% down to 10% and show a predicted KB size.
- The Flaw: They rarely allow you to set the exact pixel dimensions required by the portal. You might successfully reduce the size to 50 KB, but if the portal requires 300×300 and you upload 800×600, you have failed the compliance test. Furthermore, you still have to guess what quality percentage corresponds to your target KB size.
The Problem of Iteration and Quality Degradation
The classic workflow involves manually reducing the quality by 10% increments, saving the file, checking the size in the properties panel, and repeating. This is time-consuming. When operators get frustrated, they drastically drop the quality (e.g., 20% quality) just to meet the KB limit, resulting in a blurry, pixelated document that may pass the initial file size check but will be manually rejected later by the verification officer for being illegible.
4. Introducing the Document Optimizer: Guaranteed KB Compliance
The Document Optimizer is specifically engineered to eliminate the manual guesswork and solve the dual-compliance challenge through an advanced, two-stage Iterative Compression Algorithm.
The Core Principle: Don’t Guess, Automate
Instead of asking you to guess the right “Quality %” needed for a certain KB size, the tool asks for the Maximum KB Limit you must meet. The software then takes over, automatically finding the perfect balance between compression and quality.
Stage 1: The Precision Pixel Lock (Dimensions)
The process begins by enforcing the required pixel dimensions with surgical accuracy:
- Input: You set the mandatory Width and Height (e.g., 500×600).
- Canvas Drawing: The tool uses the HTML Canvas API to draw your uploaded image onto a new canvas that is exactly the specified pixel size. This guarantees immediate compliance with the dimension requirement.
- Initial Save: The image is initially saved at a very high quality (we start at 95% quality) to ensure maximum clarity before compression begins. This new, correctly-sized file becomes the input for Stage 2.
Stage 2: The Iterative KB Downsize Algorithm (File Size)
This is the proprietary feature that saves you time and ensures compliance. The algorithm iteratively checks and adjusts the image compression until the file size falls at or below your target KB limit.
The Algorithm Flow:
| Step | Action Taken by the Tool | Logic and Result |
| A. Setup | Takes the resized image from Stage 1. | Input: Correct Pixels, High Quality (95%). |
| B. Check Size | Converts the image to JPG at the current Quality (95%) and checks the file size (KB). | Example: Size is 120 KB. Limit is 100 KB. (120 KB > 100 KB). |
| C. Decision Point | If Current KB > Max KB Limit, the quality must be reduced. | Size is too big, must compress more. |
| D. Iteration | Reduces the current Quality by a small, safe step (e.g., 5%). (New Quality: 90%). | Goal: Maintain maximum possible quality while reducing size. |
| E. Loop | Jumps back to Step B, checking the file size at 90% quality. Repeats this loop (90% → 85% → 80%…) until the size is under the limit. | Example: Finds that at 80% quality, the file size is 98 KB. The loop stops. |
| F. Final Output | Delivers the file saved at the final, optimal quality (80%). | Result: Guaranteed under 100 KB, with the best possible visual clarity. |
This automated iteration removes the need for manual checking, ensuring the smallest possible file size that adheres to your KB limit while retaining the highest possible image quality, preventing those “blurry nightmare” rejections.
5. Step-by-Step Workflow: Using the Document Optimizer
Integrating the Document Optimizer into your daily kiosk workflow is fast and efficient. Follow these four simple steps:
Step 1: Upload Your Source Document
- Click on Step 1: Upload Image (JPG/PNG) and select the original scan, photo, or signature file.
- The tool instantly confirms the file selection and shows the Original Size in KB.
Step 2: Set Target Pixel Dimensions
- In the Target Dimensions (Pixels) area, enter the precise pixel requirements mandated by the government portal.
- For example: If the form requires a dimension of 400 pixels wide by 550 pixels high, you enter
400in the Width field and550in the Height field.
- For example: If the form requires a dimension of 400 pixels wide by 550 pixels high, you enter
- The tool immediately prepares to resize the image to this exact geometric standard.
Step 3: Set the Maximum File Size (KB Limiter)
- This is the critical step. In the Maximum File Size (KB) field, enter the hard limit specified by the form.
- If the portal says the file must be 20 KB to 50 KB, you enter
50. - If the limit is exactly 100 KB, you enter
100.
- If the portal says the file must be 20 KB to 50 KB, you enter
- You can leave the Initial Quality slider at its high default (95%)—the algorithm will handle the rest.
Step 4: Process and Download
- Click the Process & Download File button.
- The loading indicator will appear as the 2-Stage algorithm runs the resize and iterative compression checks.
- Once complete, the Optimization Complete! screen appears.
- Verification: Check the New File Size. It is guaranteed to be equal to or less than your set maximum KB limit. The screen also displays the final quality percentage used.
- Click Download JPG File. The file name is automatically tagged with the final KB limit for easy identification (e.g.,
optimized_100KB_doc.jpg).
6. Mastering Specific Document Types and Settings
To maximize speed at your kiosk, memorize these common required settings for the most frequently processed documents:
Case A: Passport Size Photographs (High Traffic)
| Requirement | Typical Portal Range | Document Optimizer Setting |
| Dimensions | 300×300, 350×450, or 400×500 Pixels | Match the portal exactly. Use the 300×300 as a common fallback. |
| KB Limit | Extremely low: 20 KB to 50 KB | Set Max KB to 50 (or 20 if required). |
| Action | Ensure the original photo is cropped to a square or specified ratio before uploading. The tool will handle the size. |
- Tip: If the original photo is high-resolution, setting the Max KB low (e.g., 20 KB) will force the algorithm to reduce the quality significantly, which is typically acceptable for small profile pictures.
Case B: Signature Scans (Most Difficult to Compress)
| Requirement | Typical Portal Range | Document Optimizer Setting |
| Dimensions | Often landscape and small: 200×50 or 140×60 Pixels | Match the portal exactly. |
| KB Limit | Very low: 10 KB to 20 KB | Set Max KB to 20 (or 10 if necessary). |
| Action | Crucial: Crop the signature image tightly before upload, leaving minimal white space. This reduces the total data the tool needs to compress, allowing for higher final quality. |
- Tip: Because signatures have very little color variation (black ink on white paper), the JPG algorithm compresses them very efficiently, but the low KB limit is still challenging. Setting the Max KB is essential here.
Case C: Scanned ID Proofs (Aadhaar, PAN, Marksheets)
| Requirement | Typical Portal Range | Document Optimizer Setting |
| Dimensions | Varies, usually larger for readability: 800×1200 or 1000×1400 Pixels | Use a standard vertical size like 800 wide, and let the height scale proportionally if allowed. |
| KB Limit | Higher limit: 100 KB to 300 KB | Set Max KB to 300. |
| Action | For scanned documents, you want to use the highest possible KB size (e.g., 299 KB if the limit is 300 KB) to ensure the text remains clear and legible. Use the tool to reduce the image to a standardized pixel size and then let the iterative algorithm maximize quality up to the 300 KB ceiling. |
7. Advanced Workflow Tips for Maximizing Efficiency
The Document Optimizer is your technical backbone. Combining it with smart workflow practices will make your kiosk operation frictionless:
A. The Importance of JPG Format
The Document Optimizer exclusively outputs files in JPG (JPEG) format. This is deliberate. While some portals accept PNG, the JPG format is required by most institutions because it uses lossy compression, which is necessary to hit those low KB limits without losing critical visual data (especially in color photos). PNG is a lossless format and often results in file sizes far too large for government standards.
B. Pre-Crop for Higher Quality
Always spend ten seconds to pre-crop your source image before uploading it to the optimizer.
- Signature: Crop right up to the edges of the signature line.
- Photo: Crop to the head and shoulder area.
- ID Proof: Crop out the desk, floor, or any background surrounding the document.
By eliminating unnecessary white space, the data the algorithm works with is smaller, meaning it can achieve your target KB size using a higher quality percentage, resulting in a crisper, cleaner final document.
C. Handle “Unmet” Limits Gracefully
In rare cases (e.g., trying to compress a massive, colorful, high-detail photo to just 10 KB), the tool might issue a warning that it could not compress the file below the limit, even at minimum quality (10%).
If this happens, you have two options:
- Slightly increase the Max KB limit (e.g., from 10 KB to 15 KB).
- Go back to Step 1 and upload a different, lower-resolution source image (e.g., take a fresh photo of the signature using a lower-resolution setting on your mobile device).
D. Integrate into Your Workflow
The best use of the Document Optimizer is to make it the final step in your document preparation:
- Scan/Capture: Get the original image.
- Crop (External Tool): Tightly crop the image to the content area (signature, photo).
- Optimize (Document Optimizer): Set the required Pixels and the Max KB limit.
- Upload: Submit the optimized file to the portal with confidence.
Conclusion: Take Back Control of Your Time
Document Optimizer Resizer And Compressor
For too long, eMitra operators and compliance staff have wasted valuable time battling unpredictable file sizes and dimensions. The Document Optimizer is a professional-grade tool built specifically to solve the dual-compliance nightmare.
By relying on its iterative KB downsizing algorithm, you gain:
- Guaranteed Compliance: Your file size will always meet the portal’s limit.
- Maximum Quality: The tool ensures the highest possible visual quality for that specific size.
- Unmatched Speed: The process takes seconds, not minutes.
Stop guessing, and start guaranteeing submission success. Use the Document Optimizer tool above for all your government portal document needs today and transform your document workflow into a quick, reliable, and error-free process.